1.My AWRD editor
Easily document and manage projects using My AWRD editor.
After signing up with AWRD, seamlessly create main pages, manage submitted entries, judge, and announce the results.
Create a new project, make it available to the public
After logging in, register a new project, and make it available to the public.
2.First screen

A: Menu for Creators
B: Menu for organizers / "My AWRD Home" button will appear. You can manage your project from here.
3.About the editing screen
Understanding this screen
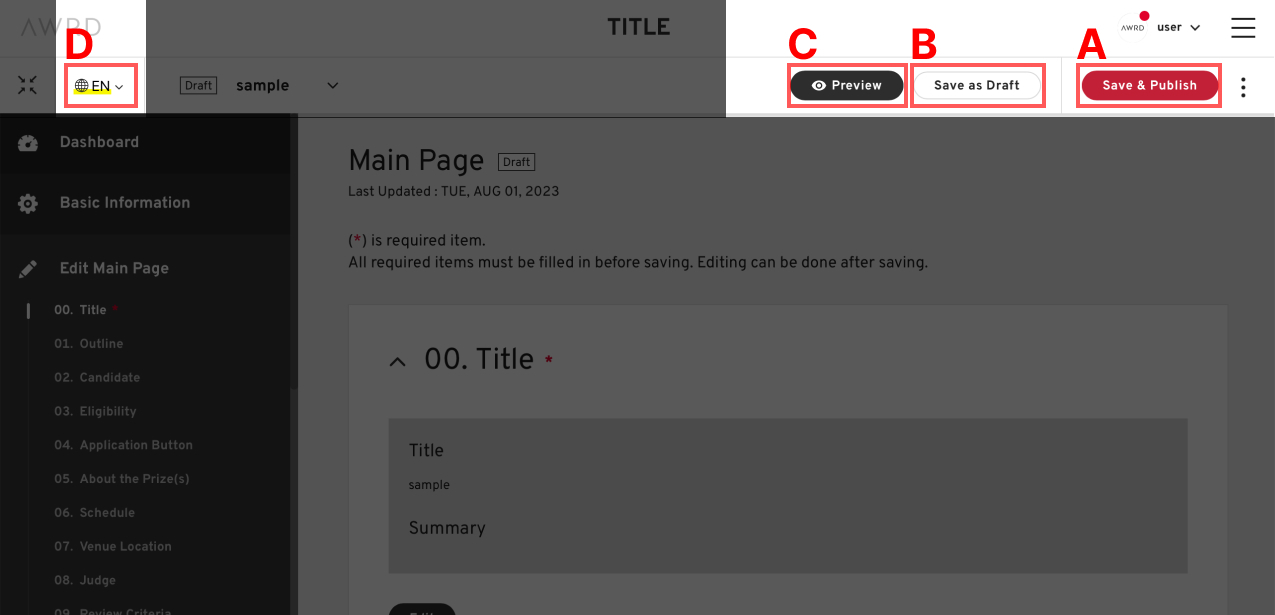
A: This button saves and publishes your edits.
B: Button to set the page to draft status (private status).
C: Allows the user to see a preview of the page as viewed by the general public.
D: This button allows you to switch between the editing screens of Japanese and English pages.
4.Roles
Organizer: This is the person sponsoring the event. This individual has the sole privilege to perform actions such as change plans or delete projects.
Operation Member: This person is a manager of the project. They are able to edit the details of the project. It is possible to add up to 20 people to this role.
Judge: This is a judge of the project. If judging is to ONLINE Review, a judge's invitation will be necessary. It is not necessary for the judge to maintain their own AWRD account.
5.Functions of My AWRD editor
Basic menu functions
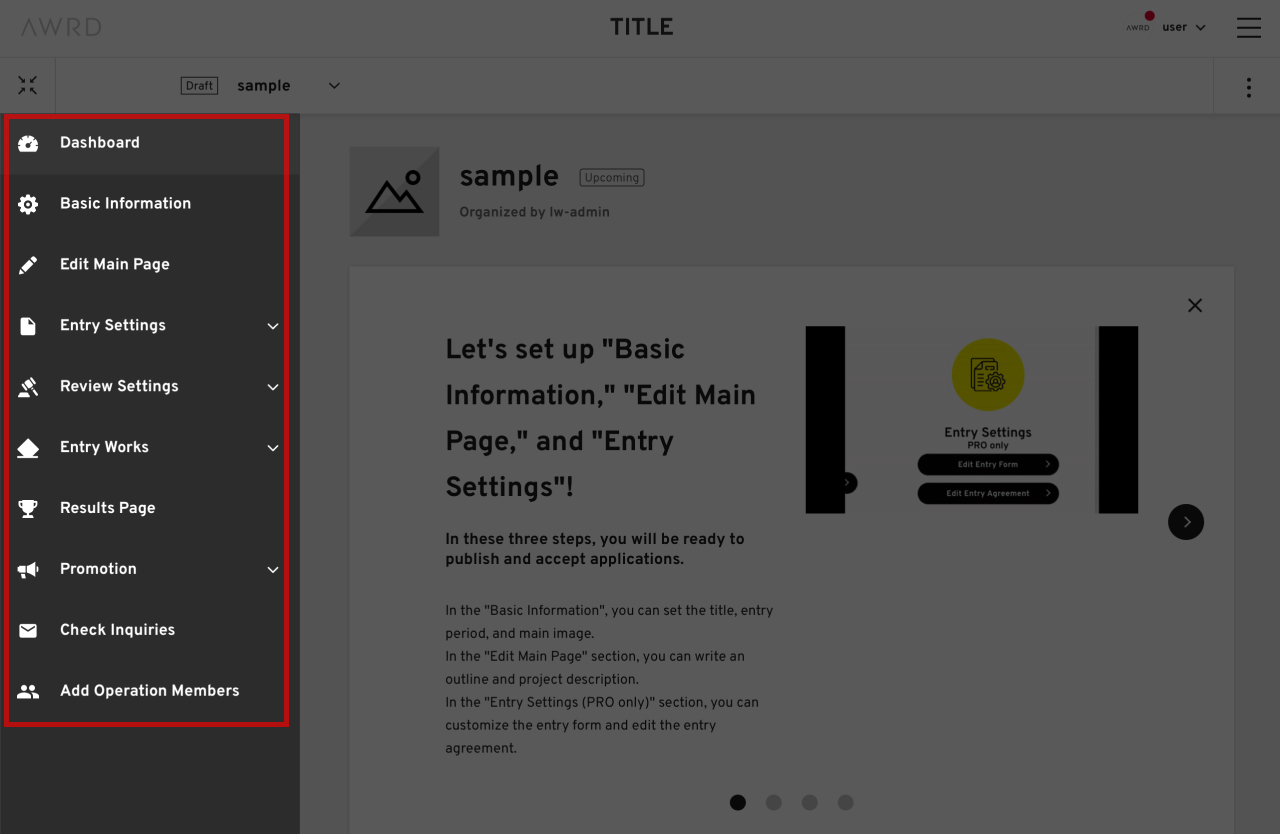
The menu on the left side of the dashboard consists largely of the following items
- Dashboard: A collection of links to pages that should be edited before the project is published.
- Basic Information: This is where you enter basic information about your project, such as the starting date of the call for proposals.
- Edit Main Page: This is the most important place where you can edit and publish the project summary.
- Entry Settings: This is where you will find the application form, terms and conditions, and other functions necessary to collect information from users.
- Review Settings: This section allows you to set the review period, duration of review, and registration of judges.
- Entry Works: All submitted data can be listed and reviewed here.
- Results Page: Create your own result announcement page.
- Promotion: You can create your own blog or free page.
- Check Inquiries: You can check and reply to inquiries from users.
- Add Operation Members: You can add members to the management team.
6.About Image Uploading
Logos, main images, judges' profile images and others can be uploaded to each location. Recommended image formats are JPEG, PNG, and GIF up to 2MB in size.
7.How to use the Dashboard
About Dashboard
The dashboard is the top page where all projects will originate. You can confirm the necessary input items to make a project public.
Accessing the Page
To access the page: Click on "Dashboard" in the left menu.
Explanation of Functions
Using the dashboard, you can confirm the progress of each project and confirm settings.
A. In addition to the project title, you can check the status of the project (e.g., before recruitment).
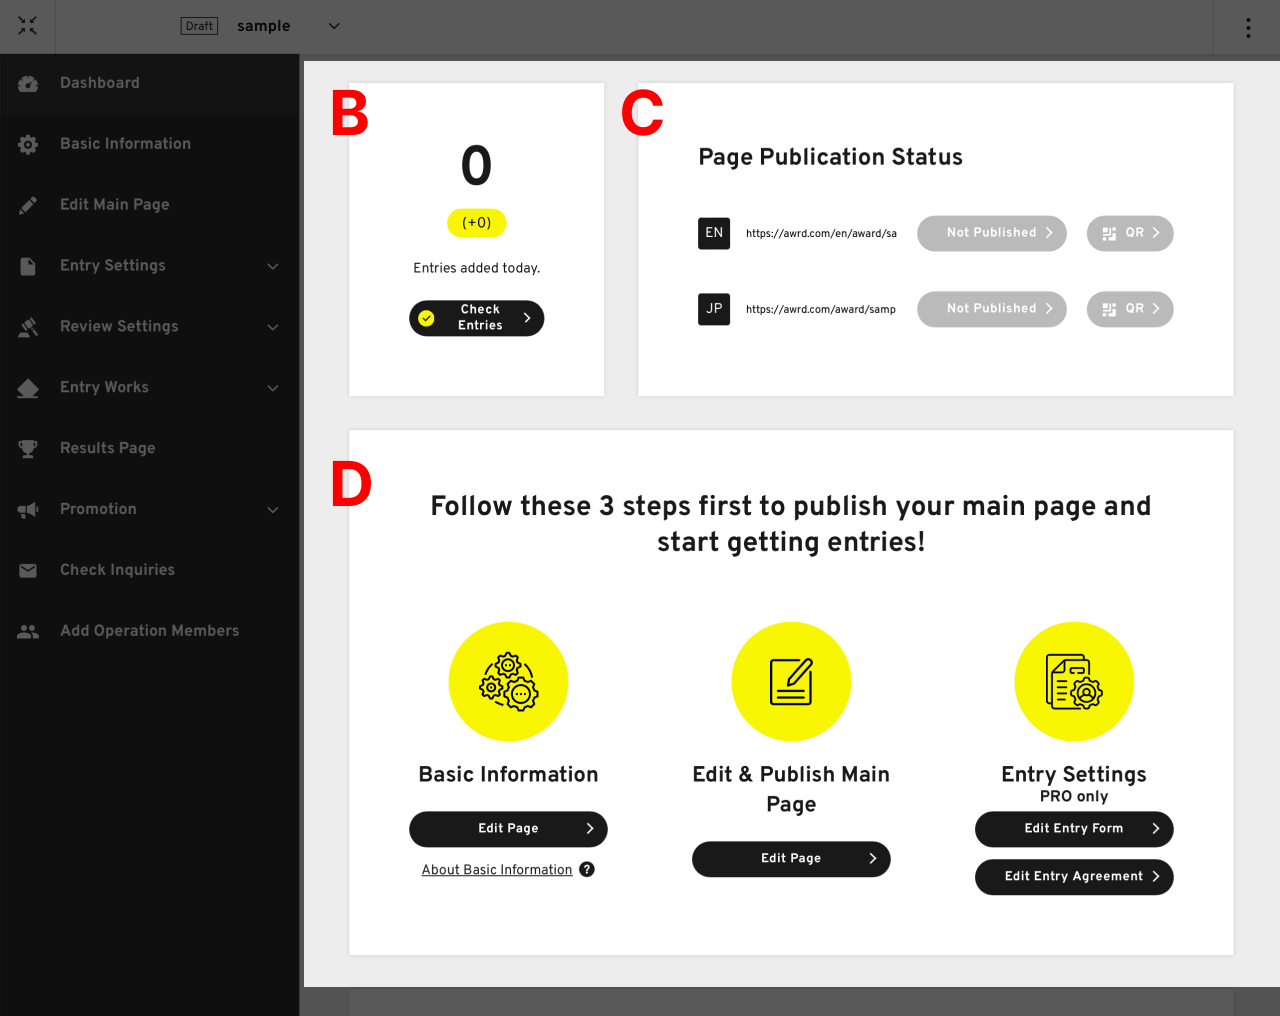
B. You will be able to see the number of entries submitted to your project and be redirected to the List of Entries page.
C. You can check the publication status of your project's Japanese and English pages and obtain a QR code.
D. You will see a list of the three tasks required to publish your project. Edit them in order and start your application.
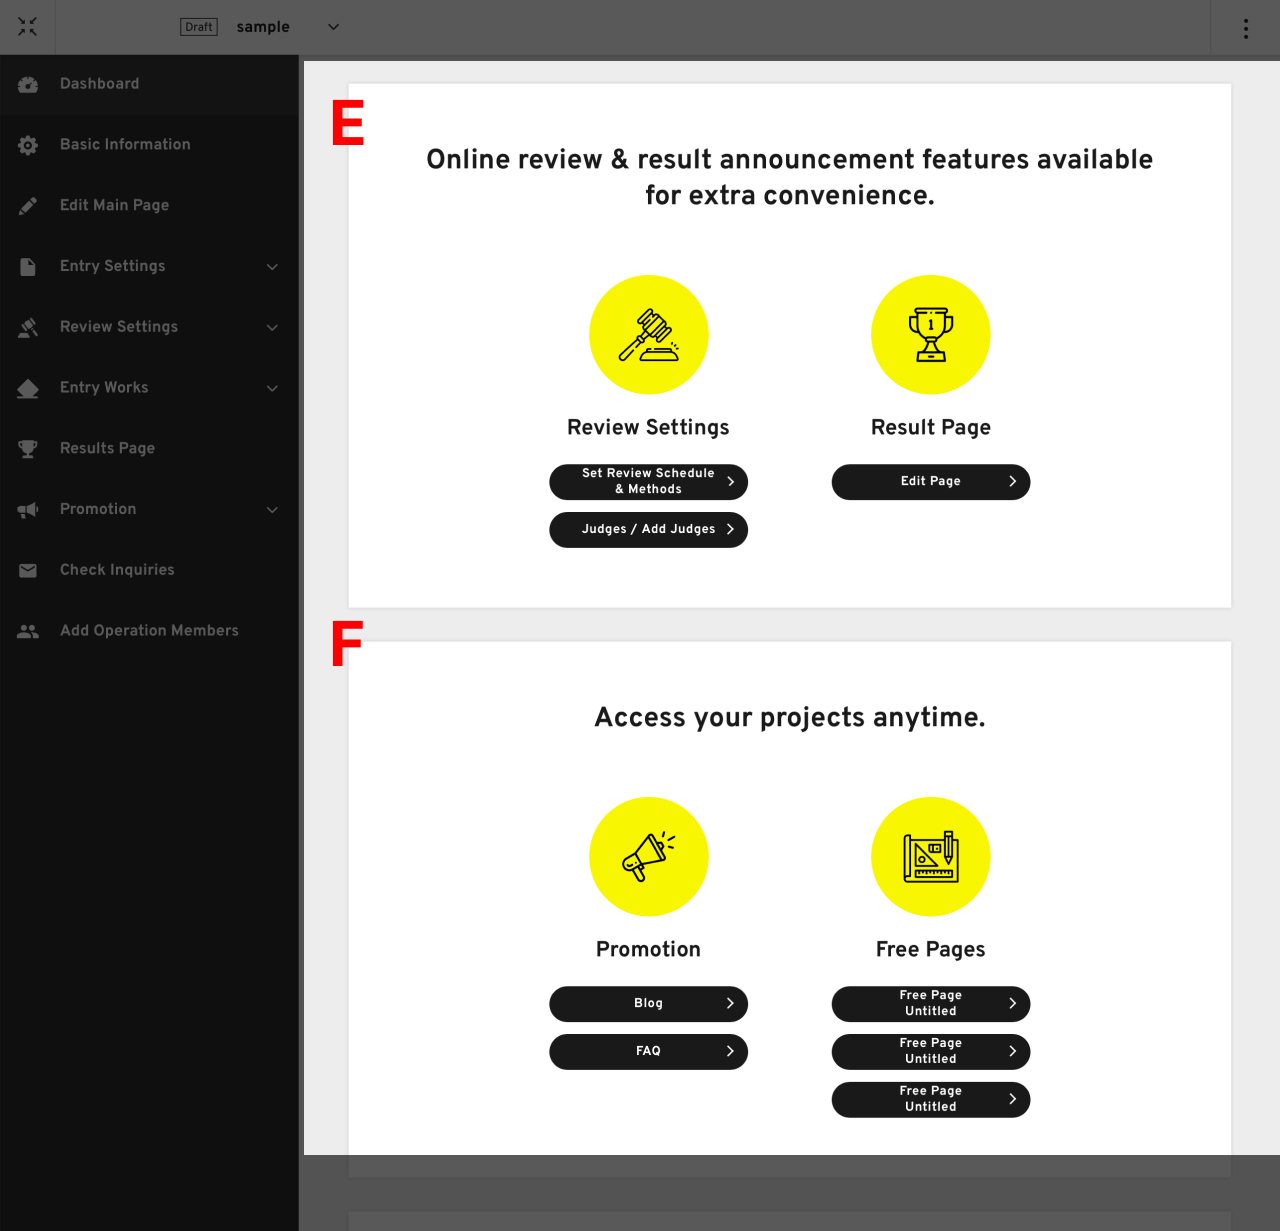
E. You can set up various settings for online judging (judging period, judging method, judge registration) and create a page to announce the results.
