Preparing to initiate a project
Basic Information Setting・Editing
How to access the page: My AWRD Home > Select Your Project > Basic Information

On this screen, information that was provided upon sign up will be displayed, but it can be freely edited and modified.
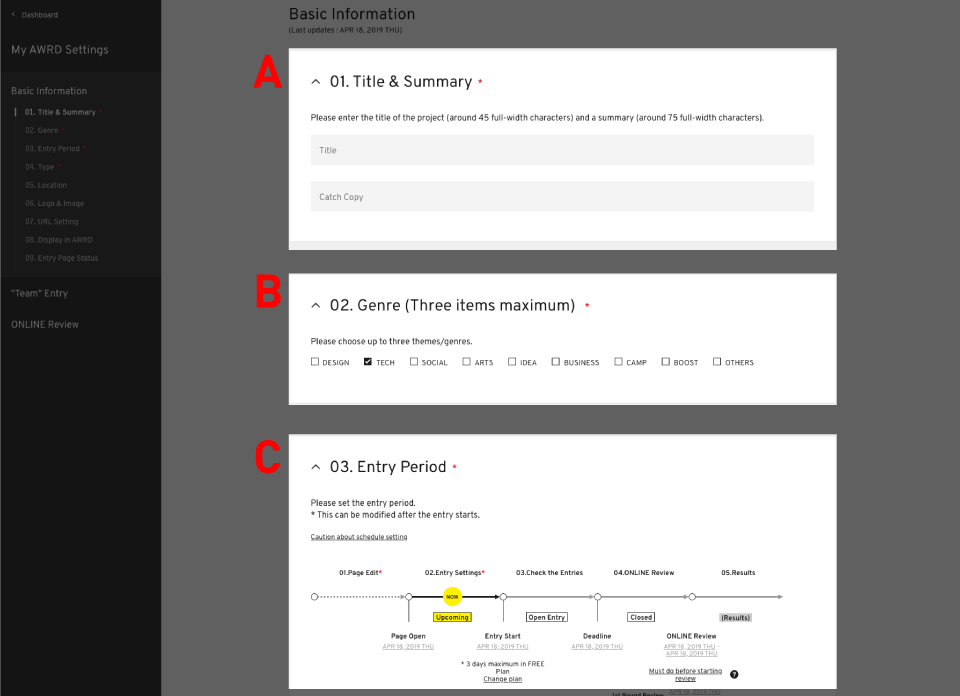
A. Enter a title and summary.
B. Choose up to 3 genres for the project.
C. Set the entry period.
D. Select the project type.
E. If the project will be hosted offline, you can enter the location it will take place.
F. Upload the logo and header images. If a header image is not input, the default picture will be displayed.
Warning
You cannot set the entry period to the day before today.Please be careful the project start just after setting If you set entry period to today.
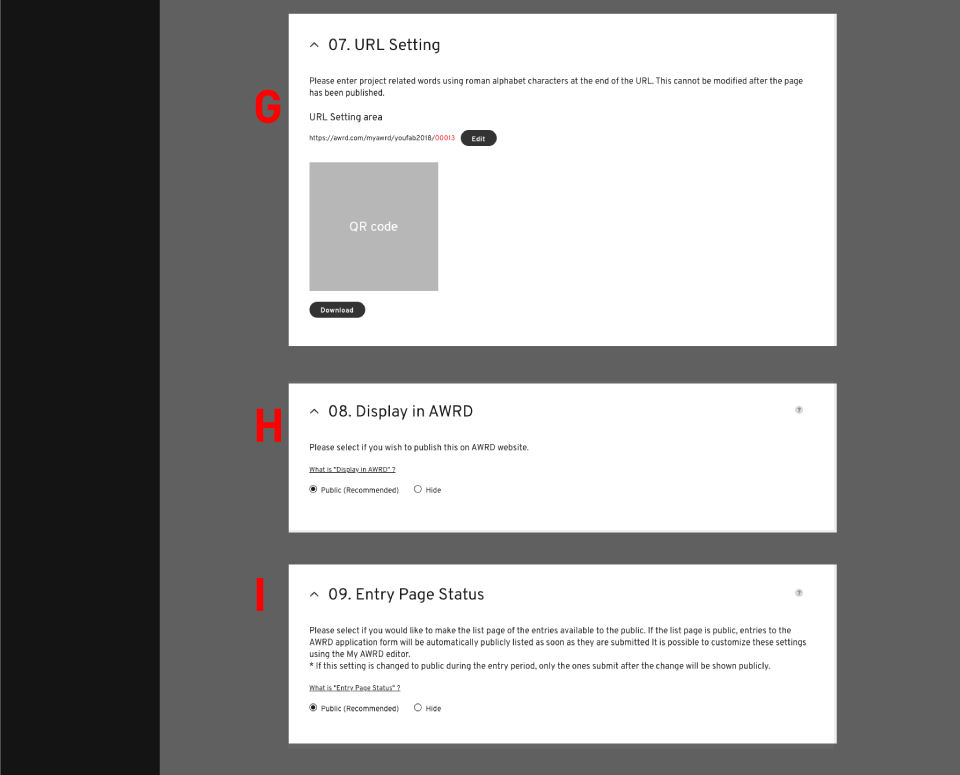
G. 未設定
H. Select whether to display / not display on the AWRD site.
I. Select whether to display / not display entries on the homepage. This setting is also affected by the setting to display user's entries publicly.
Setting for Posting on AWRD Site
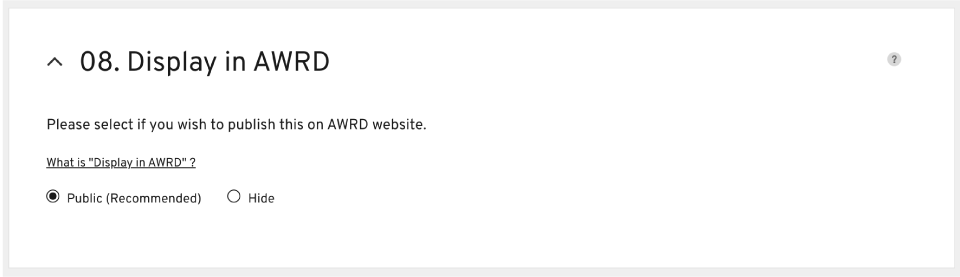
You can select whether to display / not display the project page on the AWRD Site.
If "Public" is selected, the project will be displayed on the AWRD site.
If "Hide" is selected, only the URL will be generated and it will not be displayed on the AWRD site.
Setting to Display/Not Display Entries
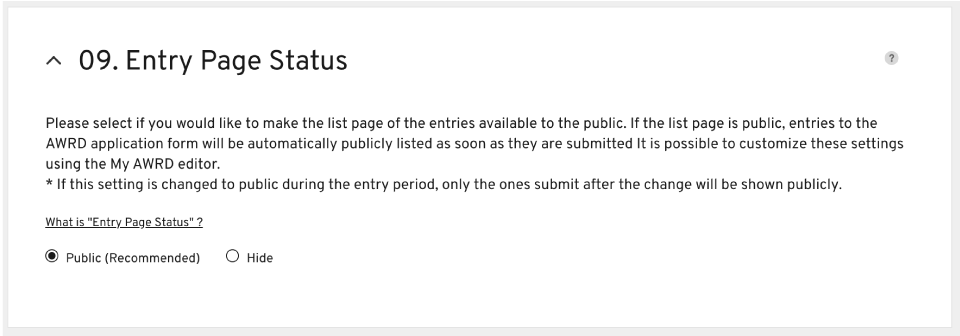
You can change whether to make public / not make public the "Entry Page" which displays on the project homepage.
A. From the left hand side menu, go to the "Entry Page Status."
B. Select whether to make entries public / hide.
C. Save the setting. If the setting is changed from public to not public, entries made after the setting is changed will all display on the page.
If the setting is changed from not public to public, entries made before the setting was changed will need to be made public manually.
Explanation of this function is available here> リンク
Creating the Recruitment Page
The Main page is created by entering the required information.
How to access the page: My AWRD Home > Select Your Project > Edit Pages

From the left hand side menu, let's enter all of the necessary information for the project, and complete the recruitment page.
・Main Page (Required)
・Entry Settings > Entry Form (Required)
・Entry Settings > Entry agreement (Required)
・Promotion > Blog
・Promotion > FAQ
・Promotion > Free Page 1 ~ 3
・ Results Page
